- Blog
- Accountable Mails Individual - DPMS Process
Accountable Mails Individual - DPMS Process
In this article, we will see how to receive, open, issue and return individual mails from the postman.
This is a sub article of DPMS
Let’s go through the procedure one by one.
Bag Recieve
Here, you have to receive all kinds of bags which comes from different sorting hubs.
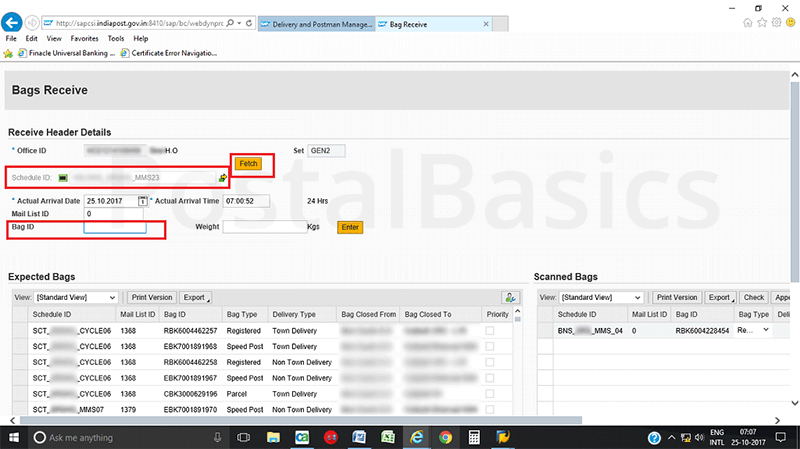
First, Click on Bag Recieve. The below window will appear

Select the Schedule ID that is, the name of the sorting hub/office from where you have received the bag. Next, click on Fetch. The Bag ID will get highlighted. Scan the Bag ID. You will get a pop up as shown below.
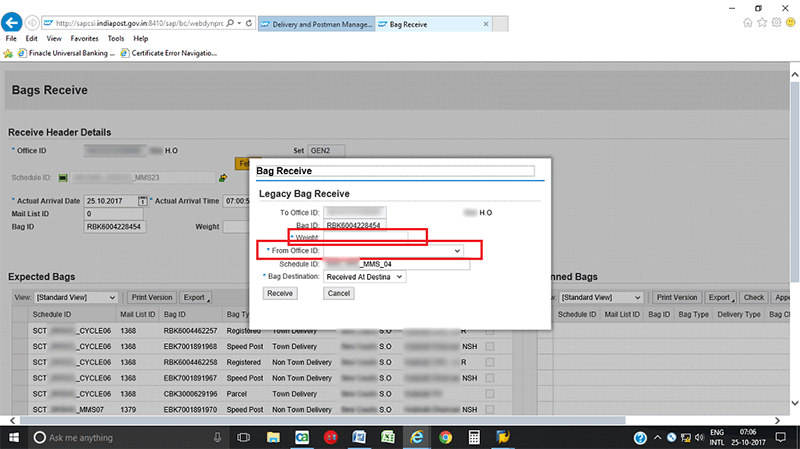
Enter the Bag weight and select the office name from where you have received it. Click on Receive.
Likewise, receive all bags here, so that it will add to the Scanned Bags as shown below.
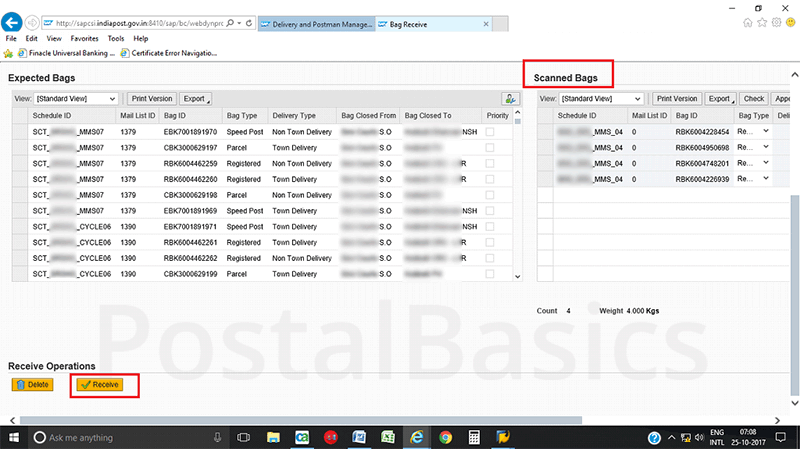
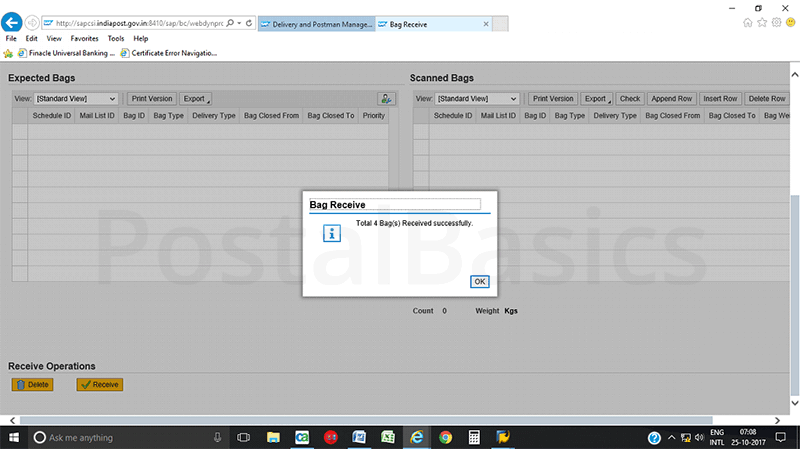
Click on Receive button at the bottom. You will get a pop up saying that “Total X bags received successfully”.
Bag Open
Click on Bag Open. Scan the Bag ID and scan all the articles received in that bag as shown below.
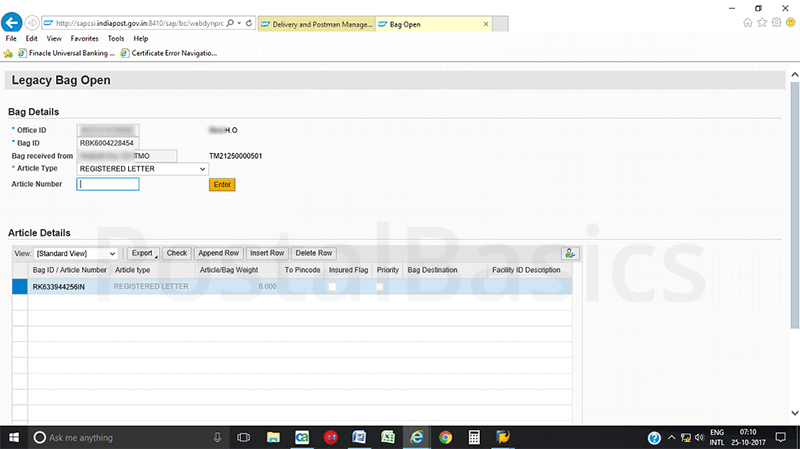
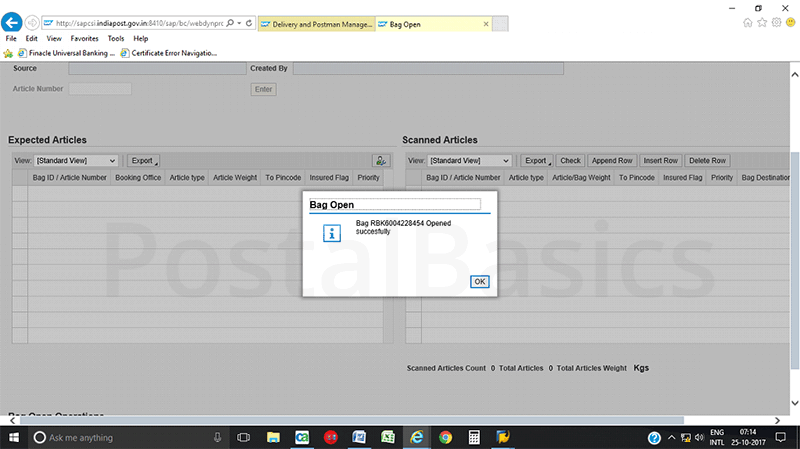
Click on Submit icon which is at the bottom of the screen. Now, you will get a pop up saying that “Bag RBK1234567 Opened successfully”.
Issue Postman
Here, you have to invoice the articles to the postman. Once you invoiced the article to any beat and saved the data, then you cannot delete it. Keep in mind that you can delete any articles before saving the data.
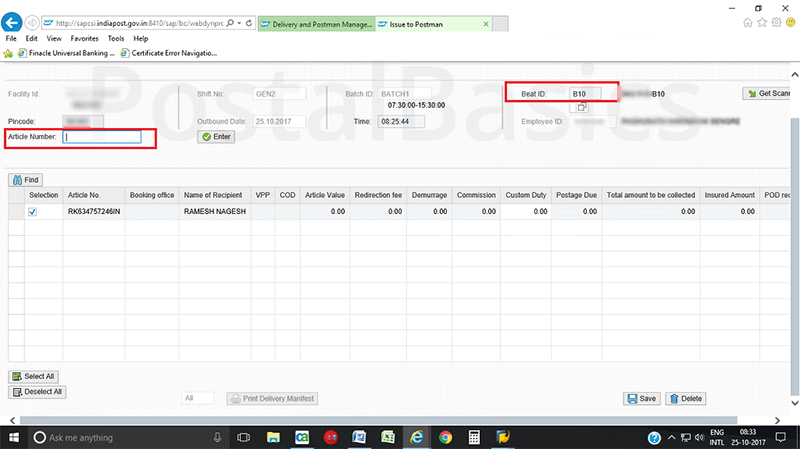
Select the Beat ID and scan the article. If all articles are properly invoiced then Select All and click on Save button.
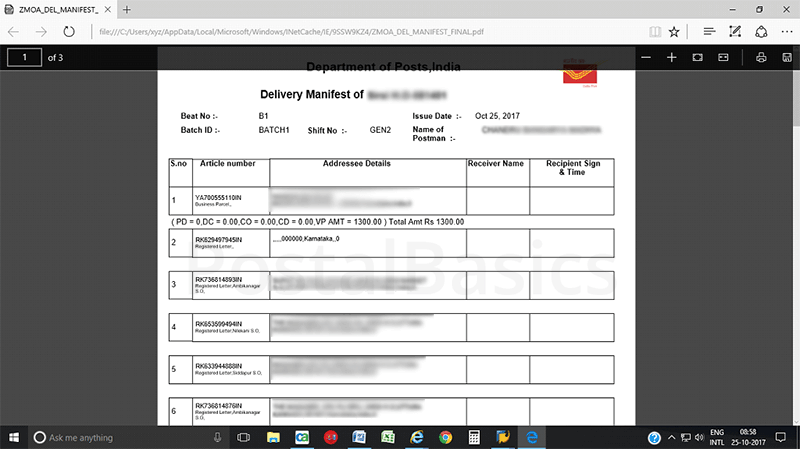
Once you have invoiced all the articles to the beat, you can take the print of Delivery Slip w.r.t letters, speed posts or parcels by clicking the Print Delivery Manifest.
There is a drop-down menu near to the icon of print manifest where you can select respective types of article. Now delivery slip will be generated as shown below.
Postman Return
When the postman returns from the beat delivery, you should take the returns from him/her. Unlike the previous module, you can take returns of all accountable articles in one shot.
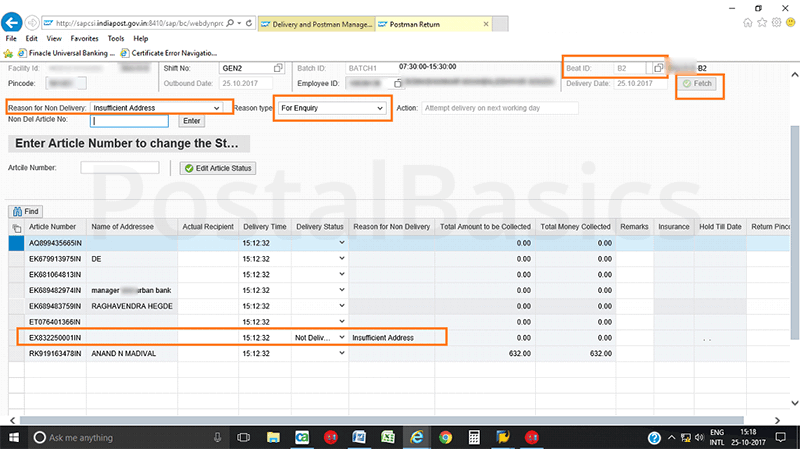
Select Beat ID and click on Fetch. All the invoiced articles will be displayed.
If any of the invoiced articles is not delivered, first select the Reason for Non-Delivery and Reason type, next scan the respective article. The reason will get updated on the delivery status.
Once you have taken the returns of all the articles, click on Save button. The below window will appear.
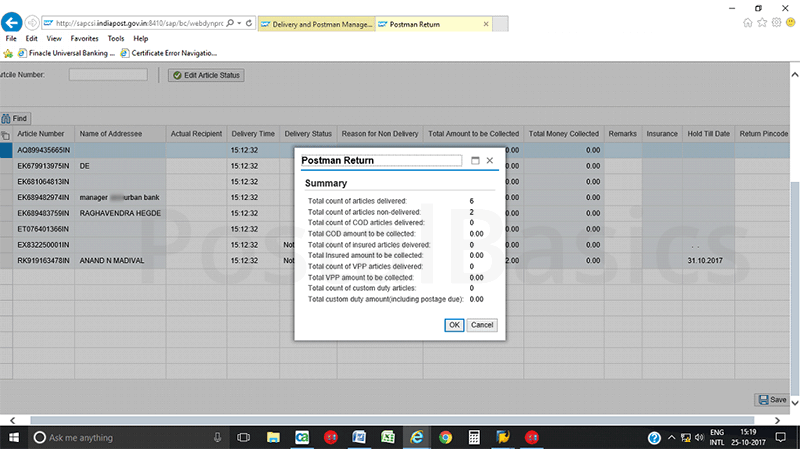
Here, you can see the total number of delivered, undelivered and VP amount. Now you can confirm the return of the articles.
Redirection
If you have received any articles which are not deliverable at your office or received by mistake then, you can redirect the articles as shown below.
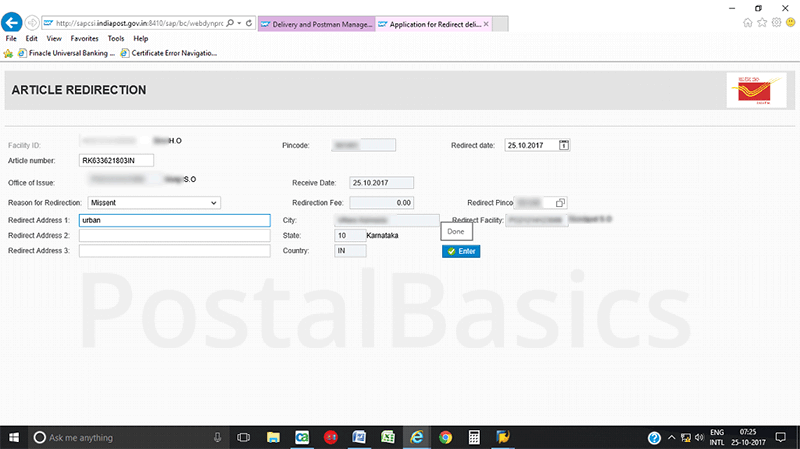
Scan the articles, select the reason as mis-sent and enter the pin code of destination (To addressed) post office. Click on the enter button.
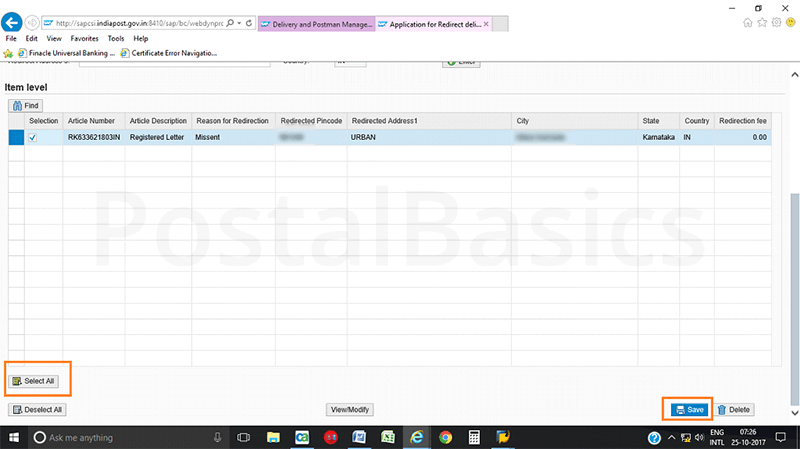
The article will be added to the list. Now, click on Select All and click on Save button.
Return
If any of the articles are kept in deposit and not claimed up to 7 days or more then, you can return the article by using RETURN option. Once you click on Return you should see the below window.
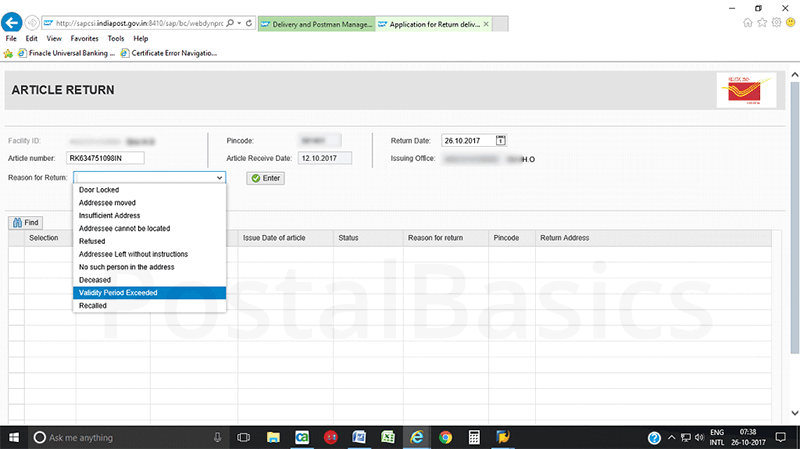
Scan the article and select the reason for return; something like Validity Expired. Click on the enter button.
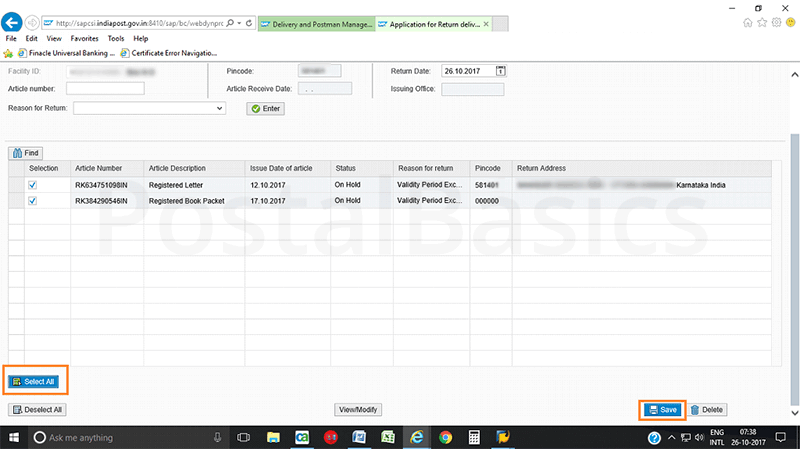
Click on Select All and click on save button. Both redirected and returned articles will go for despatch in IPVS module.